How to Make 'Watermark' Automatically on Image Articles Blog with CSS After and Overlay (VALID AMP BLOGGER)
Watermark is a sign that we make manually on a picture or video. This watermark is used to protect our image from people who carelessly take it up to admit that it is a picture of hers..
The watermark on the image is marked with the logo or company name of the copyright holder of the image. Many bloggers who often put a watermark so that images uploaded not carelessly taken by others.
To be honest I'm a bit lazy to first edit the pictures in photoshop, then put a watermark on the photos that I will upload. Because of that sense of laziness, so I rarely put watermark on image.
But, I am trying new things to overcome the lazy feel of editing the watermark in photoshop. The trick is to try to apply it through CSS language. Can it? Of course NOT.
Because it seems impossible a CSS language can make our watermarks attached automatically to an image. For that I just outsmarted by making "My Watermark"..
What kind of "watermark" that I mean?
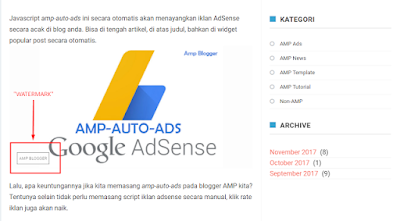
Well, if you look at every image I uploaded on this blog, it will see a text in the bottom left corner of the image I uploaded. That's what I mean as a watermark.
But you need to know, the logo or text that is not stick in the picture, but just stack it on it. So the image will remain the same as the original. if we back download it.
What CSS do I use to create "WATERMARK"?
Initially, I was looking for a text overlay tutorial on w3school, and I had an idea to create a watermark on every image I uploaded with the CSS. Because this blog uses a valid template AMP for blogger, then I change some code.
How to implement it?
Okay, I'll explain in detail how to create an automatic watermarkin the blog article image. Just follow this step.
1. Go to Themes - Edit HTML on blogger dashboard.
2. Copy the following CSS code. I will make 2 versions, for non amp and valid amp blog.
FOR NON AMP
Form Valid AMP Blogger
Note:
For non-amp blogs, paste the CSS code above ]]> </ b: skin> For valid blogger amp, please paste the code in amp-custom. change YOUR TEXT as desired.
3. Click SAVE for final Step.
Is it done?
It's basically done. However, I have a little suggestion for you who use AMP blog. To make the picture look more neat, please use special fixed-height layout code


